L2TP/IPsec on Windows 10
- Click the Windows (start) button on the bottom left of your screen. Click 'Settings'.
- In the Settings window, click 'Network & Internet Wi-Fi, airplane mode, VPN' option.
- In the Network & Internet windows, click VPN side menu tab.
- In the VPN window, click '+ Add a VPN connection'.
-
In the Add a VPN connection, click the drop down for VPN Provider and select 'Windows (built-in)'.
Click the 'Connection Name' text area and type in 'l2tpipsec CSLab'.
Click the 'Server name or address' text area and type in 'l2tpipsec.cs.toronto.edu'
Click the drop down menu for VPN type and select 'L2TP/IPsec with pre-shared key'.
Click the 'Pre-shared key' text area and type in the pre-shared key. The Pre-shared key can be found here.
Click 'Save'.

Please note that some versions of Windows 10 appear to have different options. The option for 'L2TP/IPsec with pre-shared key' may be absent from the drop down menu, in which case you will have to create the connection using 'L2TP/IPsec' and later add the key via the properties window of the VPN connection.
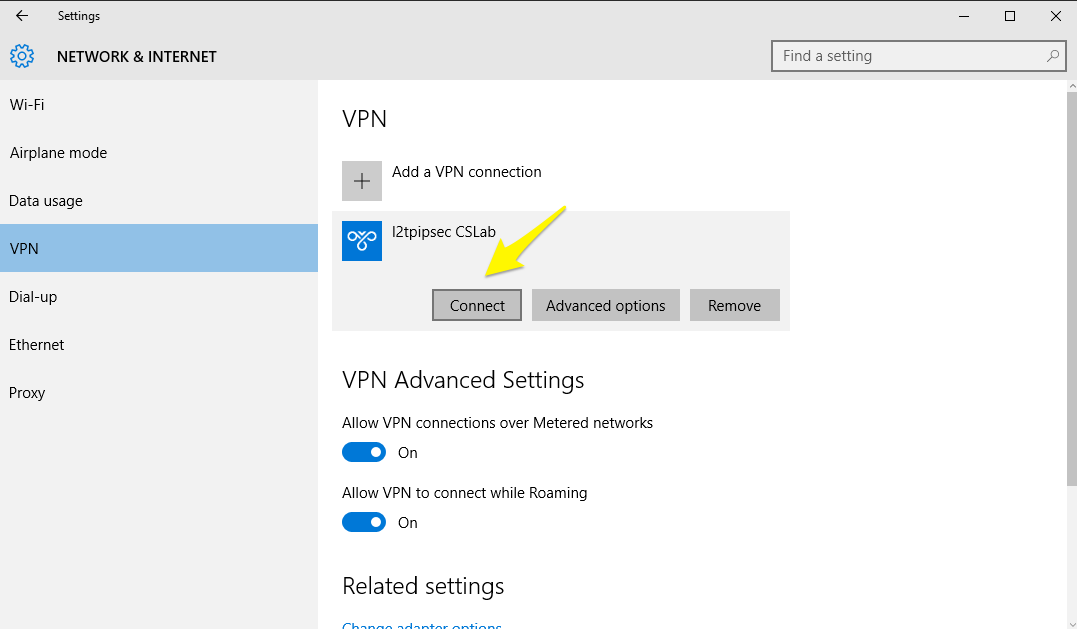
-
In the VPN window, click the 'l2tpipsec CSLab' box and click 'Connect'.
-
Enter your login credentials (leave Domain field blank). Note: Your VPN username and password are different than your CSlab username and password. To request a VPN account please contact your Point of Contact (PoC) or use the self-registration form if you have a CSLab account.
Click 'OK'
- You are now connected to the VPN. It will show as 'Connected' in the VPN window.